DIY Silk Thread Necklace: Step-by-Step Tutorial with Pictures
A silk thread necklace is an elegant and affordable alternative to gold or stone jewellery. Handmade silk thread necklaces are perfect for festive occasions, weddings, and ethnic outfits.
In this step-by-step guide, you’ll learn how to create a beautiful silk thread necklace using simple materials at home.
Why Make a Handmade Silk Thread Necklace?
 Budget-friendly – Costs much less than store-bought jewellery.
Customisable – Choose colours and beadwork to match any outfit.
Perfect for Gifting & Selling – Handmade jewellery has a high demand in ethnic markets.
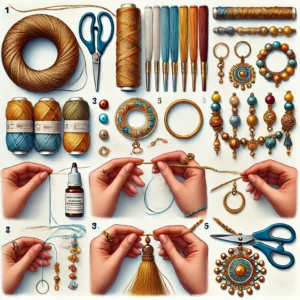
Materials Needed:
- Silk thread (colour of your choice)
- Necklace cord or thick wire (for the base)
- Threaded beads (gold, pearl, or coloured)
- Fabric glue or Fevicol
- Scissors
- Hook clasps (for securing the necklace)
Step-by-Step Process
Step 1: Prepare the Base
- Cut a necklace cord or thick wire to the desired length (15-18 inches).
- Apply a thin layer of glue and start wrapping silk thread tightly around the wire.
- Ensure the thread is evenly wrapped for a smooth look.
Step 2: String the Beads
- Once the thread wrapping is complete, start threading beads onto the necklace.
- Arrange them in a pattern (e.g., alternating colours or sizes).
- Add spacers or small pearls between large beads for a designer look.
Step 3: Securing the Ends
- Use hook clasps at both ends of the necklace to secure it.
- Apply glue inside the clasp area for extra durability.
- Allow it to dry completely for at least 4-5 hours before wearing.
Step 4: Final Touches & Wearing
- Check for any loose beads and secure them with extra glue if needed.
- Pair your handmade silk thread necklace with matching earrings or bangles for a complete look.
Expert Tips for a Professional Finish
 Double-wrap the silk thread for a richer look.
 Mix and match colours for a trendy, layered necklace.
 Add kundan or stone embellishments for a bridal jewellery effect.
How to make handmade silk thread jhumkas (earrings) – A beginner’s guide
Silk thread jhumkas are a timeless fashion accessory that complements both traditional and contemporary outfits. Making them at home allows you to experiment with colours, designs, and embellishments to match your style.
This step-by-step guide will walk you through making silk thread jhumkas using simple materials.
Why Make Your Own Silk Thread Jhumkas?
 Customizable – Choose colours and designs that match your outfits.
Affordable – DIY jhumkas cost much less than store-bought ones.
Handmade Look – Adds a personal and unique touch to jewellery.
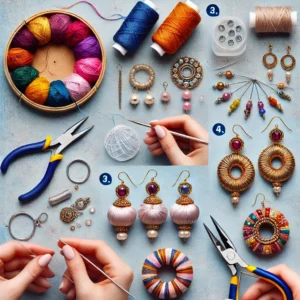
Materials Needed:
- Silk thread (any colour)
- Plastic or wooden jhumka base (available online or in craft stores)
- Fabric glue or Fevicol
- Earring hooks and headpins
- Scissors
- Decorative beads, stones, or gold chains
Step-by-Step Process
Step 1: Wrapping the Jhumka Base
- Take a plastic or wooden jhumka base.
- Apply a thin layer of fabric glue evenly across the base.
- Start wrapping silk thread tightly around the base.
- Ensure there are no gaps between the thread layers for a polished look.
Step 2: Attaching the Earring Hook
- Use a thin headpin to pierce through the top centre of the jhumka base.
- Slide a small bead onto the pin for extra decoration.
- Attach the earring hook by bending the headpin into a loop using pliers.
Step 3: Adding Decorative Elements
- Glue small beads, pearls, or golden chains around the jhumka’s edge.
- Use a toothpick to apply glue carefully for neatness.
- Arrange beads symmetrically for a professional finish.
Step 4: Let It Dry & Wear
- Allow the earrings to dry completely for at least 3-4 hours.
- Your beautiful handmade silk thread jhumkas are now ready to wear!
Expert Tips for Perfect Silk Thread Jhumkas
Use contrasting colours – A gold or white base with a coloured thread creates a unique look.
Wrap double layers of thread for a richer, fuller finish.
Experiment with embellishments – Use kundan stones, rhinestones, or pearl chains for a royal look.
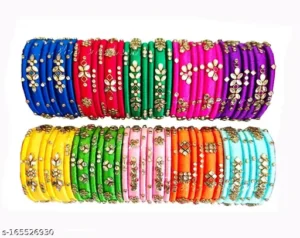
Step-by-Step guide to making silk thread bangles at home
Silk thread bangles are a beautiful and affordable alternative to traditional gold and glass bangles. Their vibrant colours and intricate designs make them a perfect accessory for ethnic and festive wear. In this guide, you’ll learn how to make silk thread bangles at home with simple materials and creative designs.
Why Choose Handmade Silk Thread Bangles?
- Budget-friendly – Costs much less than gold or metal bangles.
- Customisable – Choose colours, patterns, and decorations.
- Lightweight & Comfortable – No risk of breakage like glass bangles.
- Materials Needed:
- Plain plastic or metal bangles (any size)
- Silk thread in your preferred colours
- Fevicol or fabric glue
- Toothpicks or glue brush for even application
- Scissors
- Small decorative stones, beads, or pearls
Step-by-Step Process
Step 1: Prepare the Bangle Base
- Choose a sturdy bangle (plastic or metal).
- If using multiple bangles together, stick them using strong glue and let them dry.
- Apply a thin layer of Fevicol or fabric glue in small sections for easy handling.
Step 2: Wrapping the Silk Thread
- Tie one end of the silk thread inside the bangle to secure it.
- Begin wrapping the silk thread tightly and evenly around the bangle.
- Use toothpicks to spread the glue as you wrap, ensuring a smooth finish.
Step 3: Securing the Ends
- Once fully wrapped, apply glue to the last part of the thread.
- Press it gently and hold for a few seconds to let it dry.
Step 4: Adding Decorations
- Use small beads, pearls, or decorative stones to embellish the bangle.
- Arrange them in patterns or as a single line for a designer look.
- Use a toothpick to apply glue and carefully place each stone.
Step 5: Let It Dry & Wear
- Allow the bangles to dry completely for a few hours before using them.
- Pair them with matching outfits for a stylish ethnic look.
Tips for Making Perfect Silk Thread Bangles
- Use double layers of thread for a richer, fuller look.
- Mix two colours for a dual-tone effect.
- Try zigzag wrapping for a unique design.
- Add hanging beads or charms for an exclusive touch.
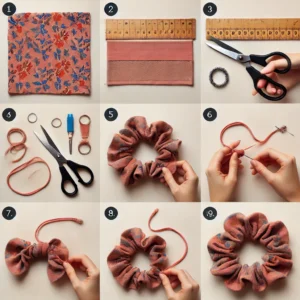
How to make handmade rubber bands and scrunchies at home – Step-by-step guide with pictures
Making rubber bands or scrunchies at home is a fun and easy DIY project. Below is a detailed guide on how to make both, along with step-by-step instructions.
How to Make a Handmade Rubber Band
Materials Needed:
- Natural rubber sheets or silicone strips
- Scissors
- Ruler
- Super glue or rubber adhesive
- A marker
Step-by-Step Process:
- Cut the Rubber Sheet:
- Use a ruler and marker to measure and draw thin strips (about 1 cm wide) on the rubber sheet.
- Cut along the lines using sharp scissors.
- Form the Band Shape:
- Take a rubber strip and stretch it slightly to check flexibility.
- Join the ends together to form a circle.
- Secure the Ends:
- Apply a small amount of rubber adhesive or super glue to the ends.
- Press the ends together firmly and let them dry for a few hours.
- Test the Elasticity:
- Once dry, stretch the band gently to check for strength and elasticity.
How to Make a Handmade Scrunchie
Materials Needed:
- A fabric of your choice (cotton, silk, or velvet)
- ¼ inch wide elastic (about 8-10 inches long)
- Sewing needle and thread or a sewing machine
- Scissors
- Safety pin
Step-by-Step Process:
- Cut the Fabric:
- Measure and cut a rectangular piece of fabric (around 20 inches long and 4 inches wide).
- Fold and Stitch the Fabric:
- Fold the fabric lengthwise, with the right sides facing each other.
- Sew along the long edge to create a fabric tube, leaving the ends open.
- Turn the Fabric Right-Side Out:
- Use a safety pin to help turn the fabric inside out.
- Insert the Elastic:
- Attach a safety pin to one end of the elastic and thread it through the fabric tube.
- Hold the other end to prevent it from getting lost inside.
- Secure the Elastic:
- Once the elastic is fully threaded, tie or sew the ends together securely.
- Close the Scrunchie:
- Tuck one end of the fabric into the other and sew it shut.
Your handmade scrunchie is now ready! 
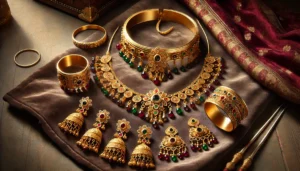
Discover the Rich Significance Behind the Ornaments Worn by Indian Women!
Explore the various traditional ornaments worn by Indian women and their cultural significance. From Maang Tikka to Anklets, discover the beauty and tradition behind each piece.
Indian culture is renowned for its rich tradition of jewelry and ornaments, which are often seen as symbols of beauty, status, and spirituality. Indian women have adorned themselves with various types of jewelry for centuries, each piece carrying cultural, religious, or social significance. The types of ornaments vary across different regions, but they share a common essence of elegance and heritage. This article explores various traditional ornaments worn by Indian women and the significance behind each piece.
1. Maang Tikka
Description: Maang Tikka is a forehead ornament worn along the parting of the hair, extending to the forehead. It typically consists of a chain with a pendant, and in some cases, a small hook at the back to secure it to the hair.
Significance: Maang Tikka is considered a symbol of feminine power and protection. It is usually worn during weddings and festive occasions. In Hindu tradition, the center of the forehead, where the pendant rests, is believed to be the ajna chakra, or the third eye, representing wisdom and power.
2. Earrings (Jhumkas, Studs, Chandbalis)
Description: Earrings come in various styles, such as Jhumkas (bell-shaped), Studs, and Chandbalis (moon-shaped). They can be made from gold, silver, pearls, or gemstones.
Significance: Earrings are believed to be an important part of a woman’s adornment in India. Jhumkas and Chandbalis are especially popular in South Indian and Mughal-inspired jewelry. They are worn to enhance facial features and are often seen as a mark of traditional beauty.
3. Nose Ring (Nath)
Description: The Nath, or nose ring, is a traditional ornament worn on the nose. It can be a small stud (Phulli) or a large ring (Nath) adorned with pearls or stones, sometimes extending to the ear with a chain.
Significance: The Nath holds immense cultural importance, especially in Indian weddings, where it symbolizes a married woman. It is also considered a mark of beauty and femininity. In Ayurveda, the left nostril is believed to be linked to reproductive organs, and piercing it is said to ease menstrual and childbirth pain.
4. Necklaces (Haar, Mangalsutra, Choker)
Description: Necklaces come in various types, such as the long Haar, the sacred Mangalsutra, and the short Choker. They can be crafted from gold, silver, pearls, or other precious stones.
Significance: Necklaces symbolize prosperity and marital status. The Mangalsutra, a black-beaded necklace worn by married Hindu women, is particularly significant as it represents the husband’s longevity and the sanctity of marriage. Chokers and Haars, on the other hand, are worn for their ornamental and aesthetic value.
5. Bangles (Kangan, Chuda)
Description: Bangles, known as Kangan or Chuda, are worn around the wrists. They are typically made of gold, glass, lac, or other metals and are available in various designs, from simple to heavily embellished.
Significance: Bangles are a symbol of prosperity, marital status, and good fortune. For married women, especially in North India, wearing red and white bangles (Chuda) is considered auspicious. Bangles are also believed to enhance blood circulation due to the constant friction against the wrist.
6. Armlets (Bajubandh)
Description: Armlets or Bajubandhs are worn around the upper arm. They are usually made of gold or silver and adorned with gemstones, pearls, or intricate designs.
Significance: Armlets are worn to symbolize strength and protection. In Indian culture, they are often associated with divine protection and are worn by brides and dancers during special ceremonies and performances.
7. Rings (Anguthi)
Description: Rings, or Anguthis, are worn on the fingers and come in various designs, from simple gold bands to elaborate pieces with gemstones and diamonds.
Significance: Rings are often associated with marital status, especially the engagement and wedding rings. In Indian culture, different fingers have different significances, and rings are believed to enhance particular qualities, such as creativity, love, or prosperity.
8. Waist Belt (Kamarbandh)
Description: Kamarbandh or waist belts are worn around the waist and can be made of gold, silver, or cloth adorned with beads and stones. They often have chains, tassels, or hanging charms.
Significance: Kamarbandhs are worn to accentuate the waistline and add grace to the woman’s gait. Traditionally, they are believed to help maintain posture and balance while walking or dancing. They are a popular accessory during weddings and classical dance performances.
9. Anklets (Payal) and Toe Rings (Bichiya)
Description: Anklets, or Payals, are worn around the ankles, often accompanied by small bells that make a melodious sound. Toe rings, or Bichiyas, are worn on the toes, usually the second toe, and are often made of silver.
Significance: Anklets are considered to attract positive energy and ward off negative influences. Toe rings are traditionally worn by married Hindu women and are believed to enhance reproductive health by applying pressure to specific nerve points.
10. Hair Ornaments (Jadai Billai, Veni, Parandi)
Description: Hair ornaments, such as Jadai Billai (hairpins), Veni (flower decorations), and Parandi (braid tassels), are used to adorn hairdos. They are often crafted from gold, silver, or colorful threads.
Significance: Hair ornaments are a significant part of bridal jewelry in India, symbolizing beauty and femininity. They are also used in classical dance forms to accentuate movements and enhance the overall aesthetic appeal.
Ornaments worn by Indian women are more than just decorative accessories; they carry deep cultural, religious, and social significance. From the Maang Tikka that represents wisdom to the Toe Rings believed to promote health, each piece of jewelry is steeped in tradition and meaning. Indian jewelry not only enhances a woman’s beauty but also connects her to her cultural roots and spiritual beliefs.
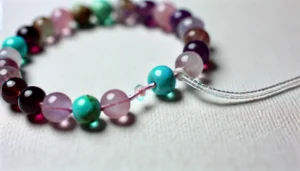
Make Your Own Stunning Beaded Bracelet with These Simple Steps!
Learn how to make a beaded bracelet with this beginner’s guide. Step-by-step instructions, materials needed, and tips to tie a secure knot!
Beaded bracelets are a popular and versatile accessory that can be customized to match any style or outfit. Creating your own beaded bracelet is a fun and creative DIY project that allows you to express your personality and creativity. This guide provides a step-by-step process for making a beaded bracelet, along with essential tips to tie the knot securely so it doesn’t loosen over time.
Materials Needed for Making a Beaded Bracelet
Before starting the process, gather the following materials:
- Beads: You can choose from a variety of beads such as glass, wooden, metal, gemstone, or acrylic, depending on your style preference.
- Elastic Cord or Beading Wire: Elastic cords are commonly used for stretch bracelets, while beading wire is more suitable for bracelets with a clasp.
- Beading Needle: A beading needle makes it easier to thread smaller beads onto the cord or wire.
- Crimp Beads or Crimp Tubes: These small metal beads are used to secure the ends of the wire in place when using a clasp.
- Jump Rings and Clasps (optional): For non-stretchy bracelets, you’ll need jump rings and clasps to fasten the bracelet.
- Scissors or Wire Cutters: These are used to cut the elastic cord or beading wire to the desired length.
- Bead Stoppers or Clips: These small clips help prevent beads from falling off the cord while you are stringing them.
- Glue (Optional): Jewelry glue or clear nail polish can be used to reinforce knots for added security.
Step-by-Step Process to Make a Beaded Bracelet
Follow these steps to create your own custom beaded bracelet:

Step 1: Choose Your Beads and Design
Decide on the type of beads you want to use for your bracelet. You can mix and match different sizes, colors, and shapes to create a unique design. Lay out the beads in the desired order on a flat surface or a bead board to visualize the final design before stringing.
Step 2: Measure and Cut the Cord
Measure your wrist using a measuring tape to determine the length of the bracelet. Add an extra inch to this measurement to allow room for tying knots. Cut the elastic cord or beading wire to the appropriate length using scissors or wire cutters.
Step 3: Secure One End with a Bead Stopper
Attach a bead stopper or clip to one end of the cord to prevent the beads from sliding off while stringing. This is particularly useful when working with multiple beads of varying sizes.
Step 4: Thread the Beads onto the Cord
Start threading the beads onto the elastic cord or beading wire in the order you have laid out. Use a beading needle to make this process easier, especially when working with small beads. Continue threading until you have added all the beads to the cord.
Step 5: Test the Fit
Once all the beads are threaded, wrap the bracelet around your wrist to check the fit. Adjust the number of beads if necessary to ensure the bracelet fits comfortably without being too tight or too loose.
Step 6: Tie a Secure Knot (Elastic Cord Method)
For stretch bracelets made with elastic cord, remove the bead stopper and tie a secure knot at the ends. The surgeon’s knot is a popular choice for securing elastic cords as it is stronger than a regular knot.
- To tie a surgeon’s knot: Cross the two ends of the elastic cord to form a loop, just like tying a regular knot. Then, pass one end of the cord through the loop twice (instead of once). Pull the ends tightly to form a secure knot.
Step 7: Reinforce the Knot
For added security, apply a drop of jewelry glue or clear nail polish to the knot. Let it dry completely to prevent the knot from coming undone over time. Trim any excess cord close to the knot using scissors.
Step 8: Secure the Ends with Crimp Beads (Beading Wire Method)
If using beading wire, thread a crimp bead or crimp tube onto one end of the wire. Loop the wire through the clasp, then back through the crimp bead. Use crimping pliers to squeeze the crimp bead securely in place, flattening it to hold the wire firmly. Trim any excess wire with wire cutters.
Step 9: Attach the Clasp (Beading Wire Method)
Repeat the process on the other end of the bracelet, attaching a jump ring and clasp to complete the bracelet. Ensure both ends are securely crimped to prevent the beads from slipping off.
Step 10: Finish and Enjoy Your Bracelet
Your beaded bracelet is now complete! Check the bracelet for any loose beads or knots and make adjustments if needed. Enjoy wearing your handcrafted jewelry or gifting it to a loved one.
Tips for Tying a Secure Knot
- Use the Right Knot: For elastic cord bracelets, a surgeon’s knot is more secure than a regular knot because it has an extra loop that holds the ends in place.
- Pull Tight, But Not Too Tight: Make sure to pull the knot tightly enough to hold the beads together but not so tight that the elastic cord stretches too much, weakening the bracelet over time.
- Reinforce with Glue: Adding a drop of jewelry glue or clear nail polish to the knot can help prevent it from slipping or loosening. Let the glue dry completely before trimming any excess cord.
- Trim Excess Cord Carefully: Cut the excess cord close to the knot but leave a small tail (about 1/8 inch) to prevent the knot from unraveling.
- Practice Different Knot Techniques: Practice tying different knots like the square knot, surgeon’s knot, and double knot to see which one works best for your type of cord and beads.
Creating a beaded bracelet is a fun and easy DIY project that allows for endless creativity. With the right materials, step-by-step guidance, and proper knotting techniques, you can make beautiful, durable bracelets that you’ll love to wear or gift. Remember to practice tying knots securely to ensure your bracelets last a long time without loosening or breaking.
DIY Resin Coasters: A Beginner’s Step-by-Step Guide to Creating Stunning Coasters!
Resin art has gained immense popularity in recent years due to its versatility and the unique aesthetic it offers. One of the most popular DIY projects within resin art is creating resin coasters. Resin coasters are not only functional but also add a beautiful touch to home decor. This guide provides a step-by-step process for beginners to create resin coasters, including the materials needed, the process to make them, and where to buy the materials.
Materials Needed for Making Resin Coasters
Before starting the resin coaster-making process, it is essential to have all the necessary materials on hand. Here is a list of the materials required:
- Epoxy Resin and Hardener: The primary material for resin coasters is epoxy resin, which comes in two parts – resin and hardener. When mixed together, these create a solid, glossy finish.
- Silicone Coaster Molds: These molds help shape the resin into coasters. They come in various shapes like round, square, hexagonal, and more.
- Mixing Cups and Stirring Sticks: Use disposable mixing cups and wooden or plastic stirring sticks to mix the resin and hardener.
- Protective Gear: Gloves, a mask, and safety goggles are essential to protect yourself from the fumes and chemicals while working with resin.
- Heat Gun or Butane Torch: A heat gun or torch is used to remove bubbles from the resin after pouring.
- Pigments and Dyes: To add color to the resin, use mica powders, alcohol inks, or liquid resin dyes.
- Glitters, Dried Flowers, and Other Embellishments: These materials can be used to add decorative elements to the resin coasters.
- Parchment Paper or Plastic Sheet: Place your molds on parchment paper or a plastic sheet to protect your workspace from resin spills.
- Measuring Scale: Accurate measurements of resin and hardener are crucial, so use a digital scale to measure the quantities.
- Resin Release Spray: This spray helps release the resin from the molds easily once cured.
Step-by-Step Process to Make Resin Coasters
Follow these steps to create your own resin coasters:
Step 1: Prepare Your Workspace
Set up your workspace in a well-ventilated area. Cover the surface with parchment paper or a plastic sheet to protect it from resin spills. Make sure all your materials are within reach. Wear protective gloves, a mask, and safety goggles to ensure safety.
Step 2: Measure and Mix the Resin
Carefully measure equal parts of resin and hardener using a measuring scale, following the manufacturer’s instructions. Pour them into a mixing cup and stir slowly for 3-5 minutes using a stirring stick. Make sure to scrape the sides and bottom of the cup to mix thoroughly. Mixing too fast can create bubbles, so take your time.
Step 3: Add Pigments and Embellishments
Divide the mixed resin into smaller cups if you plan to use different colors. Add pigments, dyes, or mica powders to the resin and stir until the color is evenly distributed. You can also add glitters, dried flowers, or other embellishments for a more decorative touch.
Step 4: Pour the Resin into the Molds
Pour the colored resin mixture into the silicone coaster molds. Fill the molds about halfway, and then gently add any additional embellishments you want to include, such as dried flowers or gold flakes. Once you’re satisfied with the design, pour another layer of resin to fill the mold completely.
Step 5: Remove Bubbles
Use a heat gun or butane torch to remove any air bubbles from the resin. Hold the torch or heat gun about 4-6 inches away from the surface and move it around until all the bubbles are gone. Be careful not to overheat the resin, as it can cause it to burn or warp.
Step 6: Let the Resin Cure
Allow the resin to cure according to the manufacturer’s instructions. This process usually takes 24-48 hours. Make sure the molds are placed on a level surface and cover them with a box or a lid to protect them from dust and debris.
Step 7: Demold the Coasters
Once the resin has fully cured, gently remove the coasters from the silicone molds. If you used a resin release spray, this process should be easy. If not, carefully peel the mold away from the coaster to avoid damaging it.
Step 8: Sand and Finish the Edges
If the edges of the coasters are rough or uneven, use fine-grit sandpaper to smooth them out. This step will give your coasters a clean, professional look.
Step 9: Apply a Clear Topcoat (Optional)
To add extra shine and protection, you can apply a clear topcoat of resin to the coasters. Mix a small amount of resin and hardener, and pour a thin layer over each coaster. Remove any bubbles with a heat gun or torch, and let it cure for another 24 hours.
Where to Buy Materials for Resin Art
Materials for resin art can be found at various craft stores, online marketplaces, and specialty resin suppliers. Here are some popular places to buy resin art materials:
- Amazon: Offers a wide range of resin, molds, pigments, and embellishments with customer reviews to help you choose the right products.
- Etsy: A great platform for finding unique silicone molds and handmade embellishments.
- Michaels and Hobby Lobby: Popular craft stores with a good selection of resin supplies, pigments, and molds.
- ArtResin: A specialized supplier for high-quality resin and resin art accessories.
- Local Craft Stores: Check out local stores for basic supplies like resin, hardener, pigments, and mixing tools.
Creating resin coasters is a fun and rewarding DIY project that allows for endless creativity. With the right materials, protective gear, and a step-by-step guide, beginners can easily master the art of resin coasters. The process involves preparing the workspace, mixing and pouring resin, adding decorative elements, and curing the final product. Once you get the hang of it, resin art can become a relaxing and fulfilling hobby.
Discover the Secrets to Stunning Aari Work with This Step-by-Step Guide!
Learn the essential tools and step-by-step process to master Aari work embroidery on blouses. Perfect for beginners and traditional fashion lovers!
Aari work, a form of intricate hand embroidery originating from India, has gained immense popularity in recent years for its exquisite designs and detailed craftsmanship. Aari embroidery is often used to embellish blouses, sarees, and other traditional garments, adding elegance and charm to the fabric. This article provides a comprehensive guide to the tools and requirements needed for Aari work, along with a step-by-step process for beginners to get started.
Tools and Materials Required for Aari Work
Before diving into the step-by-step guide, it is essential to have the right tools and materials on hand. Here is a list of essential tools and materials needed for Aari embroidery:
- Aari Needle (Tambour Needle): The primary tool used in Aari work, the Aari needle, is a fine, sharp hook resembling a crochet needle. It is designed to create intricate chain stitches with great precision.
- Wooden Hoop Frame: A wooden or plastic embroidery hoop is used to stretch and secure the fabric tightly, ensuring stability while working on the intricate designs. The frame helps maintain tension, making it easier to work with the needle.
- Embroidery Thread (Silk or Cotton): Aari work typically involves colorful silk or cotton threads. The type of thread used can vary based on the design, fabric, and desired finish.
- Fabric (Blouse Material, Silk, Cotton): Aari embroidery can be done on various fabrics, including silk, cotton, georgette, and net. The fabric choice depends on the garment you wish to embellish and the design’s complexity.
- Beads, Sequins, and Stones: To add more embellishments, beads, sequins, stones, and other decorative materials are used to enhance the beauty of the embroidery.
- Scissors: A pair of sharp scissors is essential for cutting threads and fabric edges neatly.
- Chalk or Fabric Marker: Chalk or a fabric marker is used to outline the design on the fabric before starting the embroidery.
- Thread Cutter: A thread cutter is a handy tool for trimming excess threads while working.
- Thimble: A thimble protects your fingers from needle pricks and provides a better grip on the needle.
- Measuring Tape and Ruler: These tools help ensure accuracy while marking and designing on the fabric.
Step-by-Step Guide to Aari Work on Blouses
Now that you have gathered all the necessary tools and materials, it’s time to begin the Aari embroidery process. Follow these steps to create beautiful Aari work on blouses:
Step 1: Prepare the Fabric
Begin by selecting the fabric for the blouse. Wash and iron the fabric to remove any wrinkles. Stretch the fabric onto the wooden hoop frame, ensuring it is taut and wrinkle-free. Tighten the screw to secure the fabric firmly in place.
Step 2: Draw the Design
Using chalk or a fabric marker, draw the desired design on the fabric. Start with a simple design if you are a beginner, as intricate designs require more skill and patience. Ensure that the design is clear and easy to follow.
Step 3: Thread the Aari Needle
Choose the appropriate color of embroidery thread and thread the Aari needle. Aari needles come with a small hole at the tip for threading. Ensure the thread is securely in place to prevent it from slipping while working.
Step 4: Start the Chain Stitch
Begin stitching by inserting the Aari needle into the fabric from the underside. Pull the needle up through the fabric and create a loop with the thread. Insert the needle again close to the previous stitch and pull the thread to form a chain stitch. Continue this process, following the outline of the design.
Step 5: Add Beads and Sequins
To enhance the design, you can add beads, sequins, and stones. Place a bead or sequin on the needle, and secure it with a small stitch before continuing with the chain stitch. Repeat this process, spacing the beads and sequins evenly as per the design.
Step 6: Complete the Design
Continue stitching and embellishing the design until you have covered the entire pattern. Be patient and ensure each stitch is neat and uniform. Take breaks if needed to avoid straining your eyes and hands.
Step 7: Finish and Secure the Threads
Once the embroidery is complete, finish by tying a knot at the end of the thread on the underside of the fabric. Trim any excess threads with the thread cutter or scissors. Remove the fabric from the hoop frame and gently iron it on the reverse side to flatten the stitches.
Step 8: Final Touches
Inspect the embroidery to ensure no loose threads or uneven stitches. Make any necessary adjustments or additions to perfect the design. Your Aari-embroidered blouse is now ready to wear or gift!
Conclusion
Aari work requires practice and patience, but the results are worth the effort. With the right tools, materials, and step-by-step guidance, even beginners can master the art of Aari embroidery. Start with simple designs and gradually move to more complex patterns as you gain confidence and skill. Aari work not only enhances the beauty of traditional blouses but also adds a personal touch to any outfit.
DIY Terracotta Jewelry: Unleash Your Creativity with These Easy Step-by-Step Images!
Learn how to make terracotta jewelry with our step-by-step guide. Discover the materials needed, tips, and tricks to create beautiful, sustainable pieces at home.
Terracotta jewelry, known for its earthy and rustic charm, is becoming a popular choice among DIY enthusiasts and fashion lovers alike. This handcrafted jewelry, made from natural clay, can be customized in endless designs, making it both unique and sustainable. If you’re looking to create your own terracotta jewelry, this guide will take you through the process step-by-step, complete with images to help you craft stunning pieces right at home.
What You Need to Get Started
Before diving into the steps, gather these essential materials:
- Terracotta clay (available in art supply stores)
- Rolling pin or clay roller
- Cookie cutters or any small mold for shaping
- Sandpaper
- Water and sponge
- Paints (acrylic or fabric paints)
- Paintbrushes
- Jewelry findings (hooks, earring posts, chains, etc.)
- Needle or pin for making holes
- Clear varnish or glaze for finishing
Step-by-Step Process to Make Terracotta Jewelry
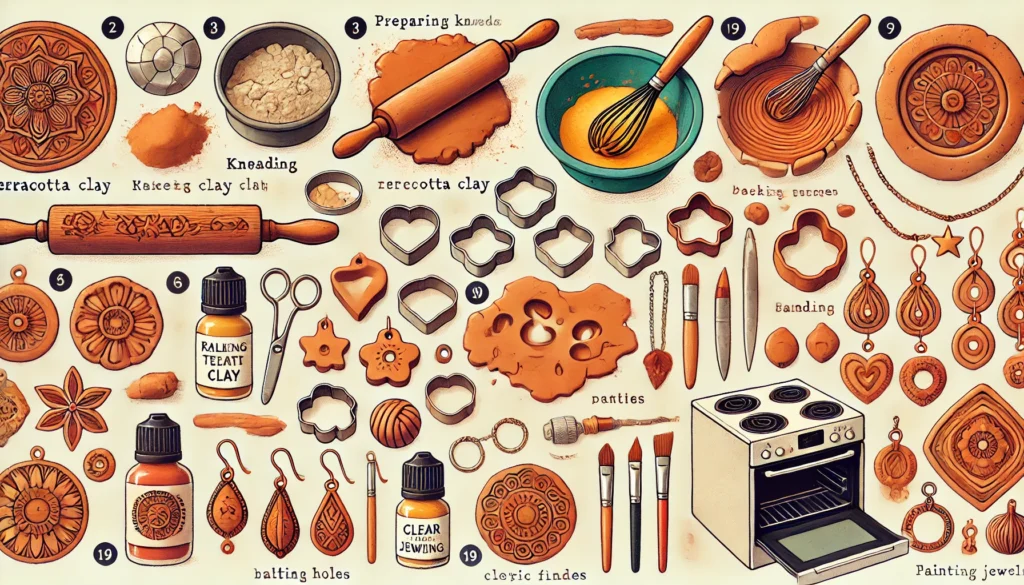
Step 1: Prepare the Clay
To start, take a small amount of terracotta clay and knead it well. Ensure there are no air bubbles, as they can cause cracks during the baking process. The clay should be soft and pliable. If it’s too dry, add a few drops of water and knead again.
Step 2: Roll Out the Clay
Using a rolling pin or clay roller, flatten the clay to your desired thickness—typically around 3 to 5 mm. This thickness ensures that the jewelry pieces are sturdy yet not too heavy to wear.
Step 3: Cut Out Shapes
Use cookie cutters, molds, or a knife to cut out shapes from the rolled-out clay. Popular shapes for terracotta jewelry include circles, squares, leaves, and geometric patterns. If you want to add more intricate designs, use a needle or a carving tool to create patterns on the surface of the clay.
Step 4: Make Holes for Findings
Using a needle or pin, carefully poke holes where you want to attach hooks, chains, or other findings. Ensure the holes are big enough to accommodate your jewelry findings but not too large that they compromise the structure of the clay.
Step 5: Smooth the Edges
Gently smooth the edges of each piece with a damp sponge or your fingers. This will help give a more polished and refined look to the final product. Let the pieces dry for a bit before moving on to the next step.
Step 6: Bake the Clay
Preheat your oven to 220°F (104°C). Place the clay pieces on a baking tray lined with parchment paper and bake for 30-40 minutes. Baking time may vary depending on the size and thickness of your pieces, so keep an eye on them. Once baked, let them cool completely before handling.
Step 7: Sand and Refine
Once the pieces are baked and cooled, use fine-grit sandpaper to smooth out any rough edges or surfaces. This step is crucial for giving your jewelry a professional finish.
Step 8: Paint Your Jewelry
Now comes the fun part—painting! Use acrylic or fabric paints to decorate your jewelry pieces. You can choose traditional designs or contemporary patterns, depending on your style preference. Allow the paint to dry completely.
Step 9: Apply a Varnish
To seal the paint and give the jewelry a shiny finish, apply a layer of clear varnish or glaze. This step also makes the jewelry water-resistant and more durable.
Step 10: Assemble the Jewelry
Attach hooks, chains, and other findings to your jewelry pieces using the holes made earlier. Use pliers to securely attach these findings, ensuring your jewelry is both functional and beautiful.
Step 11: Enjoy Your Handmade Terracotta Jewelry!
Congratulations! You’ve now created your very own terracotta jewelry. Whether it’s a pair of earrings, a necklace, or a bracelet, these handmade pieces are perfect for any occasion and make great gifts too.
Tips for Making Terracotta Jewelry
- Experiment with different shapes, sizes, and colors to create a diverse collection.
- If you’re new to painting, start with simple designs and gradually work your way up to more intricate patterns.
- Always wear a mask when sanding the baked clay to avoid inhaling any dust.
Conclusion
Making terracotta jewelry at home is a fun, creative, and eco-friendly activity that allows you to express your artistic side. With this step-by-step guide and a bit of practice, you’ll be crafting beautiful, unique jewelry pieces in no time!
Discover the unexpected comeback of ancient beadwork and beaded jewelry traditions that are turning heads!
Uncover how ancient beadwork and beaded jewelry traditions are making a vibrant comeback. Learn why these intricate pieces are capturing modern fashion.
Beadwork and beaded jewelry are experiencing a surprising resurgence, with contemporary fashion circles embracing this ancient art form in unexpected ways. Once relegated to traditional attire and cultural events, beadwork is now making bold statements on global runways and modern accessories. This vibrant craft is not just about decoration; it is a reflection of cultural heritage, artistic expression, and sustainable fashion. The revival of beaded jewelry aligns with a broader trend of returning to handcrafted, unique items that tell a story beyond the mass-produced world of fast fashion.
The History and Cultural Significance of Beadwork
Beadwork and beaded jewelry have deep historical roots, tracing back thousands of years across various cultures, from African tribes to Native American communities, and even ancient Egyptian societies. Each bead, whether made from bone, shell, glass, or gemstone, carried meaning and purpose, representing status, spirituality, or cultural identity. Beadwork was not only an artistic endeavor but also a societal marker.
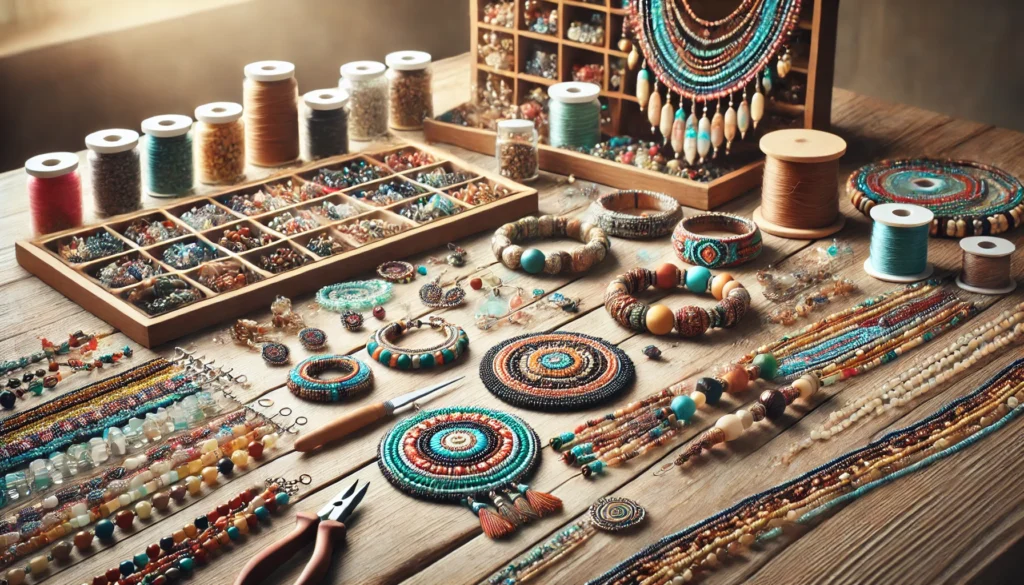
According to historians, beadwork served as a medium of communication and expression, with patterns and colors holding specific meanings. Beadwork expert Carol Wilcox noted that beads have been considered “an essential part of human expression, similar to language or music.” Today, modern artisans are reviving these ancient practices, infusing them with contemporary designs to appeal to today’s fashion enthusiasts.
Beadwork as a Modern Fashion Statement
In recent years, beaded jewelry has evolved beyond its traditional boundaries, finding a place in modern fashion as a statement piece. This transformation has been fueled by a growing appreciation for slow fashion—an approach that values craftsmanship, sustainability, and individuality. Fashion influencers and celebrities have embraced beaded jewelry for its versatility and unique aesthetic, often opting for custom-made pieces that reflect personal style.
The modern resurgence can also be attributed to a desire for more meaningful and ethical fashion choices. Unlike machine-made accessories, each beaded piece requires hours of meticulous handwork, making every piece unique. A recent fashion analyst noted that “the labor-intensive nature of beadwork aligns perfectly with current trends that favor authenticity and artisanal quality over mass-produced uniformity.”
Craftsmanship Meets Innovation: New Trends in Beaded Jewelry
The revival of beadwork is not just about re-creating traditional patterns but also about innovation and new trends. Artisans are experimenting with unconventional materials like recycled glass, sustainable beads, and even 3D-printed beads. The fusion of traditional techniques with modern technology is giving rise to fresh, innovative designs that cater to a broader market.
For example, mixed-media beadwork that combines metal, fabric, and traditional beads is becoming increasingly popular. This trend adds a contemporary twist to the classic beadwork, making it more appealing to younger consumers. Fashion expert Janet Wong observed that “by blending the old with the new, artisans are redefining what beadwork can be, ensuring it stays relevant in an ever-changing fashion landscape.”
The Future of Beadwork in the Global Market
Industry experts believe that beadwork is on track to secure a permanent place in the global market, particularly as consumers become more conscious of sustainability and the stories behind their purchases. The craft’s adaptability to modern tastes, coupled with its rich cultural heritage, gives it a unique edge.
Moreover, with the rise of online marketplaces like Etsy and Amazon Handmade, artisans from around the world now have a platform to showcase their unique creations to a global audience. As a result, there has been an increase in demand for authentic, handcrafted beaded jewelry, which not only supports local artisans but also promotes cultural heritage.
Jewelry designer Alicia Miller stated, “The value of beadwork lies not just in its beauty, but in its ability to connect the wearer to a rich tapestry of history and culture.” With the right balance of innovation and tradition, the future of beadwork appears bright and promising.
A Craft that Transcends Time
The resurgence of beadwork and beaded jewelry is more than just a fashion trend—it is a movement towards embracing heritage, sustainability, and craftsmanship in a modern context. As artisans continue to innovate while preserving ancient techniques, beadwork is set to remain a vibrant and cherished part of the global fashion scene.
Products
-
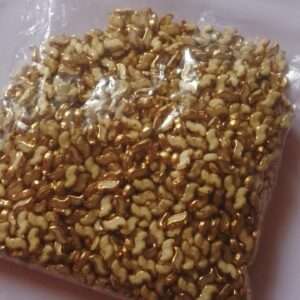
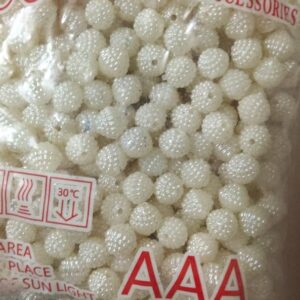 Beaded pearls 8 mm - 50 beads pack
Original price was: 30.00₹.25.00₹Current price is: 25.00₹.
Beaded pearls 8 mm - 50 beads pack
Original price was: 30.00₹.25.00₹Current price is: 25.00₹.
-
 Red and purple silk thread bangles for kids upto 2'0 size
Original price was: 250.00₹.230.00₹Current price is: 230.00₹.
Red and purple silk thread bangles for kids upto 2'0 size
Original price was: 250.00₹.230.00₹Current price is: 230.00₹.
-
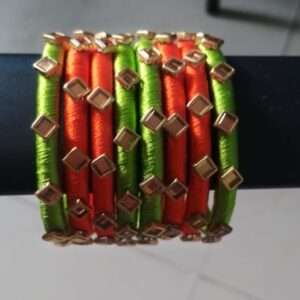 Kids Silk thread Bangles upto 2'0 size orange and green combination square kundans
Original price was: 150.00₹.120.00₹Current price is: 120.00₹.
Kids Silk thread Bangles upto 2'0 size orange and green combination square kundans
Original price was: 150.00₹.120.00₹Current price is: 120.00₹.
-
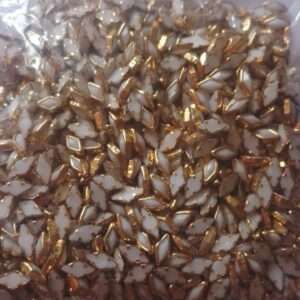 Framed Kundans diamond white
Original price was: 50.00₹.45.00₹Current price is: 45.00₹.
Framed Kundans diamond white
Original price was: 50.00₹.45.00₹Current price is: 45.00₹.
-
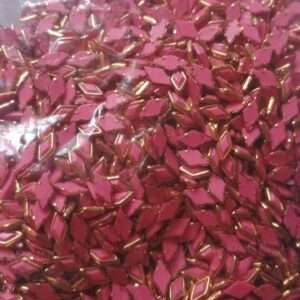
 Framed Kundans small s shape light yellow
Original price was: 50.00₹.45.00₹Current price is: 45.00₹.
Framed Kundans small s shape light yellow
Original price was: 50.00₹.45.00₹Current price is: 45.00₹.
-
 Framed Kundans diamond light pink
Original price was: 50.00₹.45.00₹Current price is: 45.00₹.
Framed Kundans diamond light pink
Original price was: 50.00₹.45.00₹Current price is: 45.00₹.
Latest Posts
- DIY Silk Thread Necklace: Step-by-Step Tutorial with Pictures
- How to make handmade silk thread jhumkas (earrings) – A beginner’s guide
- Step-by-Step guide to making silk thread bangles at home
- How to make handmade rubber bands and scrunchies at home – Step-by-step guide with pictures
- Discover the Rich Significance Behind the Ornaments Worn by Indian Women!
- Make Your Own Stunning Beaded Bracelet with These Simple Steps!