How to make easy handmade Jhumkas? Quilling Jhumkas, Silk Thread Jhumkas and Polka Dots Jhumkas
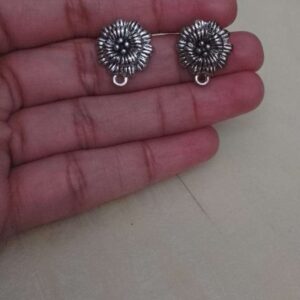
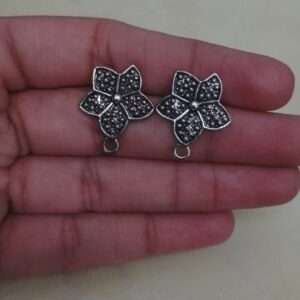
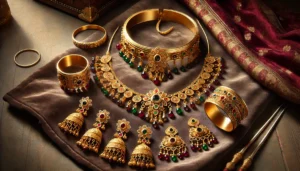
In this video, you can watch how to make easy handmade jhumkas like quilling jhumkas, silk thread jhumkas and polka dots jhumkas.

So see this video and do it yourself easy jhumkas for yourself and others.
Try these five easy DIY gift ideas for your loved ones
Check out the easy DIY gift ideas like how to make a greeting card at home when you have to time for shopping. Surprise your loved ones with your own handmade gifts.

In this video, you can see how to make a greeting card using a coloured papers and glitter papers. Also try to make a pop-up photo book, envelope and many interesting things.
Also check out how to make a valentine card for your valentine.
What is meant by 1 cut, 2 cut, 4 cut, 6 cut and 12 cut bangles?
For the beginners of silk thread jewellery making, when we want to order, the buyer will ask you which cut bangles you require and we don’t know what are those bangles mean?
So let us see what is meant by 1 cut, 2 cut, 4 cut, 6 cut and 12 cut bangles in this post.
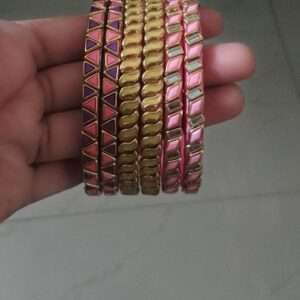
Coming to the 1 cut bangles, they are plain plastic bangles with 20 mm width.

2 cut bangles are 10 mm in width, 4 cut bangles are 5 mm in width and 6 cut bangles are 3 mm in width. 12 cut bangles are thin bangles may be 1-2 mm in width.
In addition to 20 mm, 10 mm, 5 mm, 3 mm and other thin bangles, other width of bangles like 8 mm, 25 mm, 45 mm are also available now.
Shipping Charge and Courier details – COD and time of delivery
If you are looking out for courier charges, just check it out.
The shipping charge is 80 per 500 grams and in least cases it may be more if the parcel weighs more than 500 grams. I usually prefer delhivery as it ships faster than other couriers.
Cash on Delivery charges is 50 as per the revised rules of courier partner.
Once we receive order, it will be 90% dispacthed on the next day and you will receive your parcel in 3-5 working days. In most cases maximum 2-3 days only. I request you to confirm your order for COD option as i had encountered few (1 or 2) as they have cancelled the order when it is out for delivery. It wastes my money and time i will be charged before itself i courier you when i request pickup at the courier company. They will be charged me return freight charges also. So COD orders will be dispatched only after confirmation.
In any case if you want to cancel the order, please inform me immediately before i process it and pack them. For any other queries you can add a comment and will add them in other post for any queries.
No cancellation after dispatched. If you wish to cancer order after it is out for delivery near customer location, it charges 200 as to and fro charges for cod orders.
Services we provide
Hello all the art lovers and crafters.
Here we at the silkthreadmaterials.com, we offer these service:
- We undertake orders for customized silk thread jewellery. For this you can send your requirement to my whatsapp number 7032378517.
- We do undertake orders for wrapping beads, donuts, bangles etc.
- We do make patches using quilling paper and canvas cloth. For normal designs we have added products to the shop section in patches. For any specific design feel free to contact us in whatsapp.
- We do make return gifts of silk thread bangles or earrings of your selected design in your desired range. If you have any design in your mind you can contact us.
- We do undertake orders for bridal jewellery. You can send us the design you want and we do make them in your required time.
Book your orders before and it takes 3 to 5 days depending on the work required.
Silk Thread Jewellery Making kit Basic for bangles and Earrings
We are introducing silk thread jewellery making basic kit for making silk thread bangles and silk thread earrings for beginners.
The kit has the following materials:

The picture is for reference only Materials are listed below
- Bangles 1 cut- 2 bangles
- 2 cut – 4 bangles
- 4 cut – 8 bangles
- Silk thread rolls -4 different colours
- Fevicryl -1 small tube
- Stone chain -1 meter
- Stone balls – 6 pieces
- Spacers – 10 pieces
- Pearl chain – 1 meter
- Jhumka – 10 pairs (2 pairs of five different sizes)
- Ball chain – 1 m (gold)
- Colour ball chains – 5 different colours of 1 meter each
- Cutter -1
- Plier -1
- Star chakri – 25 pieces
- Half pearls – 25 pieces
- Kundans – 20 pieces
- Chandbali – 3 pairs (sizes depends on availability)
- Drop pair -1
- Loop rings – 2 pairs
- Velvet bead – 20 pieces
- Beads – 30 (pearl, metal mixed)
- Hooks – 15 pairs
- Eye pins – 15 pairs
- Head pins – 15 pairs
- Jump Rings – 30
- Donut rings small – 6
- Pearl Hangings – 10 (6 round and 4 drop shape)
- Bead Caps – 10 pairs (mixed designs)
How to make DIY Safety pins ring, Fabric flip flop and Paper Umbrella
In this post let us see three DIYs of making safety pins ring, fabric flip flop and paper umbrella.
How to make DIY safety pins ring?
Materials required to make ring using safety pins:
- Safety pins
- Elastic
- Beads thread
DIY Method of preparing safety pins ring :
1. Get some small safety pins and some beads of your favourite colour.
2. Insert the beads into the safety pins.
3. Take two elastic threads.
4. Insert the safety pins into the elastic threads one at a time until it is long enough to fit your finger.
5. Make some tight knots at the end of the elastic threads.
How to make DIY fabric flip flop?
Materials required to make fabric flip flop:
- Flips flops
- Fabric strips
- Craft knife
- Hot glue
Method of preparing DIY fabric flip flop
1. Using a craft knife, cut off and remove the straps of the flip flops.
2. Take two fabric strips of fabric and insert them into the top hole of the flipflop as shown.
3. Tie a knot in the back.
4. Tie two knots at the top as shown and then the fabric into one hole each and tie knots at the back to hold them in place.
5. Cut off the excess fabric and apply some hot glue over the knots at the back to hold it in place.

How to make DIY Paper Umbrella?
Materials required to make DIY paper umbrella:
- Craft paper
- Scissors
- Fevistick
- Hot glue gun
- Toothpick/thin stick
- Pearl/bead
- Bead-cap
Method of preparing DIY paper umbrella:
1. Cut several circles of radius 5 cm from a craft paper.
2. Fold all the circles in half.
3. Fold in half again. Crease well and unfold.
4. Apply some glue near the crease lines and fold again as shown in the video.
5. Flatten the two loops formed as shown.
6. Apply some glue on the folded corner of one circle and paste another folded circle on it.
7. Repeat this until all the circles have been stuck together.
8. Paste the two ends together.
9. Using some hot glue, stick a pearl or bead on the top center.
10. Similarly, use some hot glue and stick a toothpick or thin stick at the bottom center.
11. Insert a bead-cap at the end as shown.
How to make DIY bangles, Spoon Candle Holder and Cupcake Liner Flower?
In this post we will show the best art DIYs in 2017. You can check the video and procedure in this post. This is first part of the video and we will tell you three DIY’s in this post of making bangles, candle holder and cupcake liner flower.
First let us check how to make DIY Embellished Bangles:
Materials required to make embellished DIY Bangles:
- Bangles
- Embroidery thread
- Stone chain
- Fevi-kwik
Method of making Embellished bangles:
1. Take a plain bangle, and using some fevi-kwik, stick some embroidery thread or silk thread on the inner edge of the bangle.
2. Stick the stone chain carefully on the outer edge of the bangle.
3. Now, insert the embroidery thread in between each stone and twist along the bangle all the way until the thread covers the entire bangle and are secure. Make 2 to 3 twists between each stone.
4. Secure the final thread and stones by sticking it in place using fevi-kwik.
5. And now your bangles are ready to adorn your hands.

How to make DIY Spoon Candle Holder?
Materials required to make DIY spoon candle holder:
- Plastic spoons
- Drinking Glass (made of glass)
- Hot glue gun
- Golden spray paint
- Candle
Method of making spoon candle holder:
1. First, cut the spoon’s hand.
2. Start sticking the spoons’ head on glass one after one, starting from the top.
3. Spray golden spray paint on the spoons and inside the glass too.
4. Let it dry completely.
5. Light up a candle and keep it inside the spoon candle holder.
How to make DIY Cupcake Liner Flower?
Materials required to make DIY Cupcake Liner Flower:
- Cupcake liners
- Scissors
- Hot glue gun
- Crepe paper
Method of making Cupcake Liner Flower:
1. Fold the cupcake liner in half.
2. Fold twice again.
3. Cut a curve along the top as shown.
4. Repeat the same with several liners.
5. Apply some hot glue on the center of a liner and paste another liner on it.
6. Repeat until all the liners are stuck one over the other.
7. Take a green coloured crepe paper and fold it into one-eights.
8. Cut a curve as shown and unfold.
9. Paste this under the cupcake liners.
10. Bundle up each layer of cupcake liner as shown.
How to make DIY Glass Bangles Candle Holder?
Materials required to make DIY Glass Bangles Candle Holder
- Glass bangles
- Fevi kwik
- Stone chain
- Candle
Method of making Glass Bangles Candle Holder
1. Take some glass bangles. You can use old bangles and uplift them.
2. Using some fevi-kwik or strong adhesive, stick them together one on top of the other.
3. Once a certain height is reached, stick a stone chain over the top.
4. Place a candle in the centre.
How to make DIY Pearl Bangles?
Materials required to make DIY Pearl Bangles:
- Silk threads
- Cardboard
- Bangles (thick)
- Needle
- Pearl beads
- Glue
- Scissors
Method of making Pearl Bangles:
1. Take any coloured silk thread and wrap it around a paper or cardboard. Bunch the threads together and cut it as shown.
2. Apply glue on one end and spread it. Apply pearls and put it on wrapped bangles using needle. Secure them tightly and see the video for more detailed information for doing pearl bangles.
Making of designer Earrings using paper
Check out how to make designer earrings at home by using paper.
Materials required for making designer earrings at home
- Half pearls in two sizes
- Pearl Beads
- Small gold colour beads
- Pearl Chain
- Stone Chain
- Ball Chain
- Eye pins
- Head pins
- Stud bases with stopper
- Canvas Sheet
- Glue
- Tools like cutter and plier
- Gold colour paint
Method of doing:
First take canvas sheet and cut into a rectangle. Apply gold paint on it and allow it to dry. Apply glue on it and paste a big size half pearl at the center. Apply required amount of glue around it to paste ball chain around the half cut pearl. Now cut the extra part around the ball chain but leave some part on one side.
Take a head pin. Put a small colour gold bead and a pearl bead in it t make it as a hanging by curving it. Pearl hangings in round shape are also available readily in our online shop. Attach an eye pin into the pearl hanging. Cut the extra long part of the eye pin. With the help of a medium size button draw a circle on a square white paper and cut the circle with the help of a blade. Now you will have two square pieces with open round circle at the center.

Apply gold paint on one of the square pieces. Apply glue around the circle and paste pearl chain.Attach stone chain around the pearl chain. Now fix half pearl beads around the stone chain. Cut the extra sheet using blade. Also cut another paper in the same design by putting the paper under it.
Pierce the stud to the previously prepared stud and cut the extra part as shown in the video. Attach the stud to one end of the prepared circle ring by placing it between designer stud and white paper. on the opposite stud of stud place the pearl hanging which was made previously. Now apply required amount of glue all over the back of designer stud and put the white paper on it to fix stud and hanging fixed tightly. Apply gold paint on the outer side of the white paper and now your designer earrings are ready.
How to make Silk Thread Jhumkas with Studs
Check here how to make silk thread Jhumkas easily. Check our site for new tutorials for making silk thread jewellery at home.
Materials required for making silk thread jhumkas:
- Silk Thread
- A pair of round Jhumka Bases
- Pearl Chain
- Ball Chain
- Ball Chain big size
- Canvas sheet
- Gold colour beads or half beads
- Bead Caps
- Plain Stud base
- Eye pin
Video Courtesy by Quilling Earrings
Silk Thread Jhumkas making Method:
First take silk thread and make 25 strands with it. Glue the strands at one end and cut at the joint. Now take a jhumka base and attach the end of glued silk thread strands from inside of the jhumka base. Glue the other ends of the strands of silk thread and neatly wrap the jhumka base. See that all the rigid and no loose strands are left behind. Now wrapped jhumka base is ready.
How to make a stud?
Take a canvas sheet and cut it in the form of a square. At the centre of the cut canvas cloth apply glue. Put a gold colour bead and apply glue around it to paste a ball chain. Allow it to dry. Cut the extra ball chain and add another layer of big size ball chain and now paste pearl chain around the ball chain. Allow the stud to dry. Now cut the extra sheet from the stud.

Cut a round canvas cloth same as the size of the stud and pierce a stud base at its centre. Now attach the stud base to the back of the prepared stud.
Now take wrapped jhumka base and apply glue on its edge as a line and attach the pearl chain. Stick it firmly by gently pushing the pearl chain with your fingers. Apply glue on the top of jhumka base and stick a bead cap.
Now take an eye pin and put a bead in it. Insert it into the jhumka base from down, on top of it also place a bead and turn the end to inside.Now a round is seen where you can put the stud. Put a stopper and now your jhumkas are ready.
