Home » Posts tagged 'how to make a bracelet'
Tag Archives: how to make a bracelet
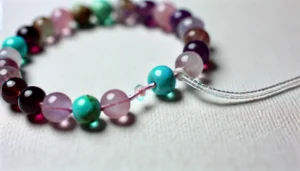
Make Your Own Stunning Beaded Bracelet with These Simple Steps!
Learn how to make a beaded bracelet with this beginner’s guide. Step-by-step instructions, materials needed, and tips to tie a secure knot!
Beaded bracelets are a popular and versatile accessory that can be customized to match any style or outfit. Creating your own beaded bracelet is a fun and creative DIY project that allows you to express your personality and creativity. This guide provides a step-by-step process for making a beaded bracelet, along with essential tips to tie the knot securely so it doesn’t loosen over time.
Materials Needed for Making a Beaded Bracelet
Before starting the process, gather the following materials:
- Beads: You can choose from a variety of beads such as glass, wooden, metal, gemstone, or acrylic, depending on your style preference.
- Elastic Cord or Beading Wire: Elastic cords are commonly used for stretch bracelets, while beading wire is more suitable for bracelets with a clasp.
- Beading Needle: A beading needle makes it easier to thread smaller beads onto the cord or wire.
- Crimp Beads or Crimp Tubes: These small metal beads are used to secure the ends of the wire in place when using a clasp.
- Jump Rings and Clasps (optional): For non-stretchy bracelets, you’ll need jump rings and clasps to fasten the bracelet.
- Scissors or Wire Cutters: These are used to cut the elastic cord or beading wire to the desired length.
- Bead Stoppers or Clips: These small clips help prevent beads from falling off the cord while you are stringing them.
- Glue (Optional): Jewelry glue or clear nail polish can be used to reinforce knots for added security.
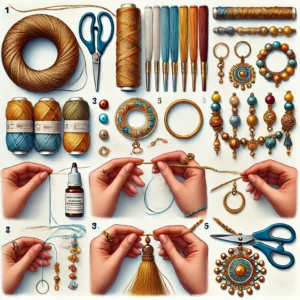
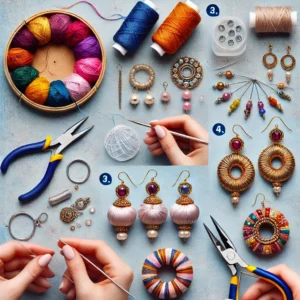
Step-by-Step Process to Make a Beaded Bracelet
Follow these steps to create your own custom beaded bracelet:

Step 1: Choose Your Beads and Design
Decide on the type of beads you want to use for your bracelet. You can mix and match different sizes, colors, and shapes to create a unique design. Lay out the beads in the desired order on a flat surface or a bead board to visualize the final design before stringing.
Step 2: Measure and Cut the Cord
Measure your wrist using a measuring tape to determine the length of the bracelet. Add an extra inch to this measurement to allow room for tying knots. Cut the elastic cord or beading wire to the appropriate length using scissors or wire cutters.
Step 3: Secure One End with a Bead Stopper
Attach a bead stopper or clip to one end of the cord to prevent the beads from sliding off while stringing. This is particularly useful when working with multiple beads of varying sizes.
Step 4: Thread the Beads onto the Cord
Start threading the beads onto the elastic cord or beading wire in the order you have laid out. Use a beading needle to make this process easier, especially when working with small beads. Continue threading until you have added all the beads to the cord.
Step 5: Test the Fit
Once all the beads are threaded, wrap the bracelet around your wrist to check the fit. Adjust the number of beads if necessary to ensure the bracelet fits comfortably without being too tight or too loose.
Step 6: Tie a Secure Knot (Elastic Cord Method)
For stretch bracelets made with elastic cord, remove the bead stopper and tie a secure knot at the ends. The surgeon’s knot is a popular choice for securing elastic cords as it is stronger than a regular knot.
- To tie a surgeon’s knot: Cross the two ends of the elastic cord to form a loop, just like tying a regular knot. Then, pass one end of the cord through the loop twice (instead of once). Pull the ends tightly to form a secure knot.
Step 7: Reinforce the Knot
For added security, apply a drop of jewelry glue or clear nail polish to the knot. Let it dry completely to prevent the knot from coming undone over time. Trim any excess cord close to the knot using scissors.
Step 8: Secure the Ends with Crimp Beads (Beading Wire Method)
If using beading wire, thread a crimp bead or crimp tube onto one end of the wire. Loop the wire through the clasp, then back through the crimp bead. Use crimping pliers to squeeze the crimp bead securely in place, flattening it to hold the wire firmly. Trim any excess wire with wire cutters.
Step 9: Attach the Clasp (Beading Wire Method)
Repeat the process on the other end of the bracelet, attaching a jump ring and clasp to complete the bracelet. Ensure both ends are securely crimped to prevent the beads from slipping off.
Step 10: Finish and Enjoy Your Bracelet
Your beaded bracelet is now complete! Check the bracelet for any loose beads or knots and make adjustments if needed. Enjoy wearing your handcrafted jewelry or gifting it to a loved one.
Tips for Tying a Secure Knot
- Use the Right Knot: For elastic cord bracelets, a surgeon’s knot is more secure than a regular knot because it has an extra loop that holds the ends in place.
- Pull Tight, But Not Too Tight: Make sure to pull the knot tightly enough to hold the beads together but not so tight that the elastic cord stretches too much, weakening the bracelet over time.
- Reinforce with Glue: Adding a drop of jewelry glue or clear nail polish to the knot can help prevent it from slipping or loosening. Let the glue dry completely before trimming any excess cord.
- Trim Excess Cord Carefully: Cut the excess cord close to the knot but leave a small tail (about 1/8 inch) to prevent the knot from unraveling.
- Practice Different Knot Techniques: Practice tying different knots like the square knot, surgeon’s knot, and double knot to see which one works best for your type of cord and beads.
Creating a beaded bracelet is a fun and easy DIY project that allows for endless creativity. With the right materials, step-by-step guidance, and proper knotting techniques, you can make beautiful, durable bracelets that you’ll love to wear or gift. Remember to practice tying knots securely to ensure your bracelets last a long time without loosening or breaking.
Products
-
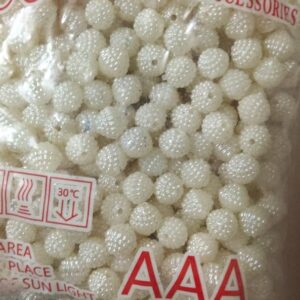 Beaded pearls 8 mm - 50 beads pack
Original price was: 30.00₹.25.00₹Current price is: 25.00₹.
Beaded pearls 8 mm - 50 beads pack
Original price was: 30.00₹.25.00₹Current price is: 25.00₹.
-
 Red and purple silk thread bangles for kids upto 2'0 size
Original price was: 250.00₹.230.00₹Current price is: 230.00₹.
Red and purple silk thread bangles for kids upto 2'0 size
Original price was: 250.00₹.230.00₹Current price is: 230.00₹.
-
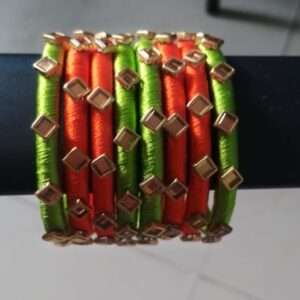 Kids Silk thread Bangles upto 2'0 size orange and green combination square kundans
Original price was: 150.00₹.120.00₹Current price is: 120.00₹.
Kids Silk thread Bangles upto 2'0 size orange and green combination square kundans
Original price was: 150.00₹.120.00₹Current price is: 120.00₹.
-
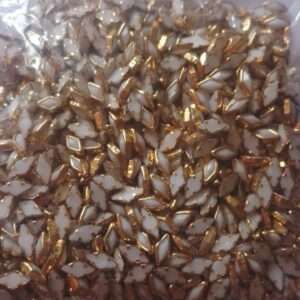 Framed Kundans diamond white
Original price was: 50.00₹.45.00₹Current price is: 45.00₹.
Framed Kundans diamond white
Original price was: 50.00₹.45.00₹Current price is: 45.00₹.
-
 Framed Kundans small s shape light yellow
Original price was: 50.00₹.45.00₹Current price is: 45.00₹.
Framed Kundans small s shape light yellow
Original price was: 50.00₹.45.00₹Current price is: 45.00₹.
-
 Framed Kundans diamond light pink
Original price was: 50.00₹.45.00₹Current price is: 45.00₹.
Framed Kundans diamond light pink
Original price was: 50.00₹.45.00₹Current price is: 45.00₹.
Latest Posts
- DIY Silk Thread Necklace: Step-by-Step Tutorial with Pictures
- How to make handmade silk thread jhumkas (earrings) – A beginner’s guide
- Step-by-Step guide to making silk thread bangles at home
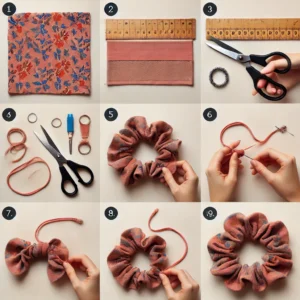
- How to make handmade rubber bands and scrunchies at home – Step-by-step guide with pictures
- Discover the Rich Significance Behind the Ornaments Worn by Indian Women!

- Make Your Own Stunning Beaded Bracelet with These Simple Steps!