Home » Posts tagged '#TerracottaJewelry'
Tag Archives: #TerracottaJewelry
DIY Terracotta Jewelry: Unleash Your Creativity with These Easy Step-by-Step Images!
Learn how to make terracotta jewelry with our step-by-step guide. Discover the materials needed, tips, and tricks to create beautiful, sustainable pieces at home.
Terracotta jewelry, known for its earthy and rustic charm, is becoming a popular choice among DIY enthusiasts and fashion lovers alike. This handcrafted jewelry, made from natural clay, can be customized in endless designs, making it both unique and sustainable. If you’re looking to create your own terracotta jewelry, this guide will take you through the process step-by-step, complete with images to help you craft stunning pieces right at home.
What You Need to Get Started
Before diving into the steps, gather these essential materials:
- Terracotta clay (available in art supply stores)
- Rolling pin or clay roller
- Cookie cutters or any small mold for shaping
- Sandpaper
- Water and sponge
- Paints (acrylic or fabric paints)
- Paintbrushes
- Jewelry findings (hooks, earring posts, chains, etc.)
- Needle or pin for making holes
- Clear varnish or glaze for finishing
Step-by-Step Process to Make Terracotta Jewelry
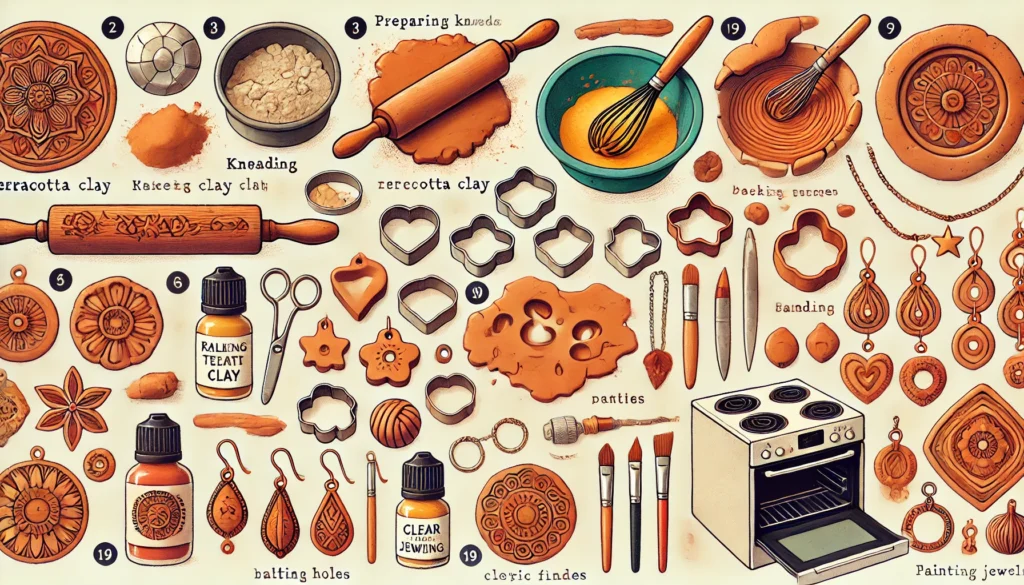
Step 1: Prepare the Clay
To start, take a small amount of terracotta clay and knead it well. Ensure there are no air bubbles, as they can cause cracks during the baking process. The clay should be soft and pliable. If it’s too dry, add a few drops of water and knead again.
Step 2: Roll Out the Clay
Using a rolling pin or clay roller, flatten the clay to your desired thickness—typically around 3 to 5 mm. This thickness ensures that the jewelry pieces are sturdy yet not too heavy to wear.
Step 3: Cut Out Shapes
Use cookie cutters, molds, or a knife to cut out shapes from the rolled-out clay. Popular shapes for terracotta jewelry include circles, squares, leaves, and geometric patterns. If you want to add more intricate designs, use a needle or a carving tool to create patterns on the surface of the clay.
Step 4: Make Holes for Findings
Using a needle or pin, carefully poke holes where you want to attach hooks, chains, or other findings. Ensure the holes are big enough to accommodate your jewelry findings but not too large that they compromise the structure of the clay.
Step 5: Smooth the Edges
Gently smooth the edges of each piece with a damp sponge or your fingers. This will help give a more polished and refined look to the final product. Let the pieces dry for a bit before moving on to the next step.
Step 6: Bake the Clay
Preheat your oven to 220°F (104°C). Place the clay pieces on a baking tray lined with parchment paper and bake for 30-40 minutes. Baking time may vary depending on the size and thickness of your pieces, so keep an eye on them. Once baked, let them cool completely before handling.
Step 7: Sand and Refine
Once the pieces are baked and cooled, use fine-grit sandpaper to smooth out any rough edges or surfaces. This step is crucial for giving your jewelry a professional finish.
Step 8: Paint Your Jewelry
Now comes the fun part—painting! Use acrylic or fabric paints to decorate your jewelry pieces. You can choose traditional designs or contemporary patterns, depending on your style preference. Allow the paint to dry completely.
Step 9: Apply a Varnish
To seal the paint and give the jewelry a shiny finish, apply a layer of clear varnish or glaze. This step also makes the jewelry water-resistant and more durable.
Step 10: Assemble the Jewelry
Attach hooks, chains, and other findings to your jewelry pieces using the holes made earlier. Use pliers to securely attach these findings, ensuring your jewelry is both functional and beautiful.
Step 11: Enjoy Your Handmade Terracotta Jewelry!
Congratulations! You’ve now created your very own terracotta jewelry. Whether it’s a pair of earrings, a necklace, or a bracelet, these handmade pieces are perfect for any occasion and make great gifts too.
Tips for Making Terracotta Jewelry
- Experiment with different shapes, sizes, and colors to create a diverse collection.
- If you’re new to painting, start with simple designs and gradually work your way up to more intricate patterns.
- Always wear a mask when sanding the baked clay to avoid inhaling any dust.
Conclusion
Making terracotta jewelry at home is a fun, creative, and eco-friendly activity that allows you to express your artistic side. With this step-by-step guide and a bit of practice, you’ll be crafting beautiful, unique jewelry pieces in no time!
Products
-
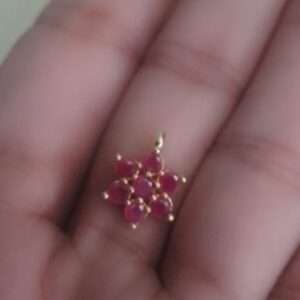 AD Flower pendant for invisible necklace - pink stone
Original price was: 40.00₹.35.00₹Current price is: 35.00₹.
AD Flower pendant for invisible necklace - pink stone
Original price was: 40.00₹.35.00₹Current price is: 35.00₹.
-
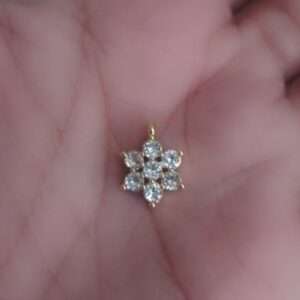 AD Flower pendant for invisible necklace - white stone
Original price was: 40.00₹.35.00₹Current price is: 35.00₹.
AD Flower pendant for invisible necklace - white stone
Original price was: 40.00₹.35.00₹Current price is: 35.00₹.
-
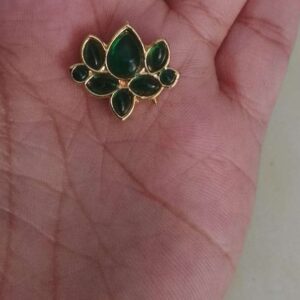 Lotus pendants for invisible necklace - green
Original price was: 38.00₹.35.00₹Current price is: 35.00₹.
Lotus pendants for invisible necklace - green
Original price was: 38.00₹.35.00₹Current price is: 35.00₹.
-
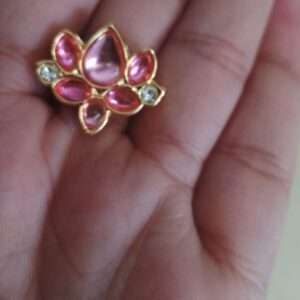 Lotus pendants for invisible necklace - baby pink
Original price was: 38.00₹.35.00₹Current price is: 35.00₹.
Lotus pendants for invisible necklace - baby pink
Original price was: 38.00₹.35.00₹Current price is: 35.00₹.
-
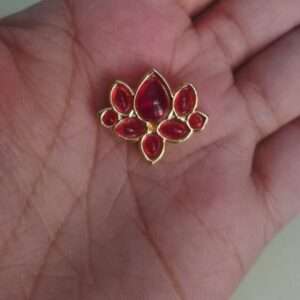 Lotus pendants for invisible necklace - pink
Original price was: 38.00₹.35.00₹Current price is: 35.00₹.
Lotus pendants for invisible necklace - pink
Original price was: 38.00₹.35.00₹Current price is: 35.00₹.
-
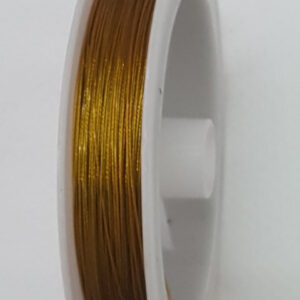 Gear wire for making Necklace - Gold colour
Original price was: 60.00₹.55.00₹Current price is: 55.00₹.
Gear wire for making Necklace - Gold colour
Original price was: 60.00₹.55.00₹Current price is: 55.00₹.
Latest Posts
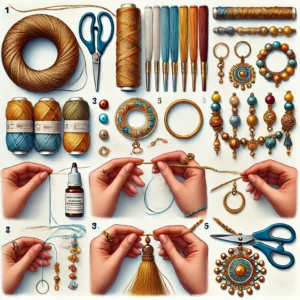
- DIY Silk Thread Necklace: Step-by-Step Tutorial with Pictures
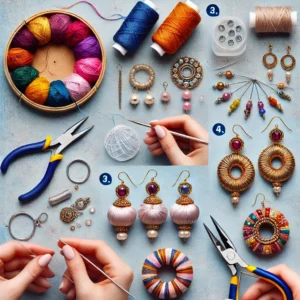
- How to make handmade silk thread jhumkas (earrings) – A beginner’s guide
- Step-by-Step guide to making silk thread bangles at home

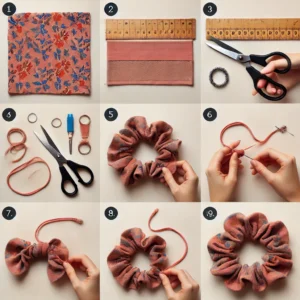
- How to make handmade rubber bands and scrunchies at home – Step-by-step guide with pictures
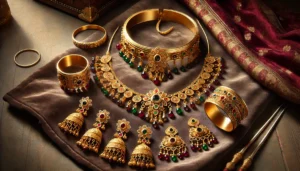
- Discover the Rich Significance Behind the Ornaments Worn by Indian Women!
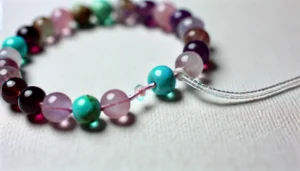
- Make Your Own Stunning Beaded Bracelet with These Simple Steps!