Learn how to draw elegant feather mandala patterns step by step using simple lines, curves, dots and decorative details.
Course: Mandala Art Academy
Module: Intermediate Designs
Lesson: 15
Skill level: Intermediate
Practice time: 45 to 60 minutes
Feather mandala patterns bring softness, flow and elegance into a mandala design. While geometric mandalas feel structured and floral mandalas feel organic, feather patterns sit beautifully in between. They can look delicate, decorative and slightly dramatic at the same time, which makes them perfect for intermediate learners who want to add more variety and richness to their mandala art.
In this lesson, you will learn what makes a feather pattern look balanced, how to build it step by step, how to place it inside a mandala, and how to avoid the most common mistakes that can make feather motifs look uneven or messy.
What is a feather mandala pattern?
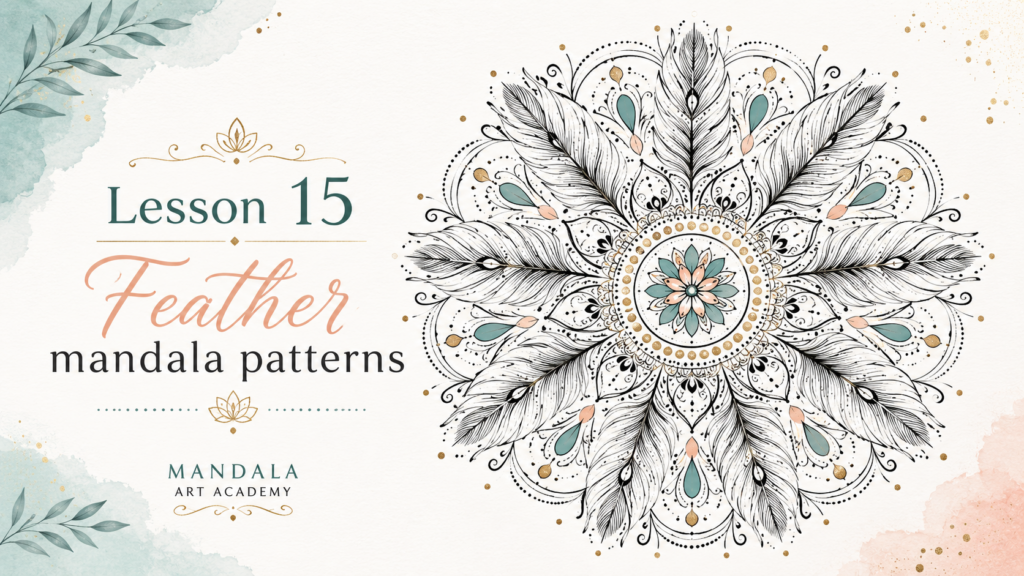
A feather mandala pattern is a decorative shape inspired by the natural form of a feather. In mandala art, it usually begins with a central line or spine and then grows outward with repeated curved strokes, leaf-like segments, tiny lines, dots or layered details on both sides.
You can use feather motifs in many ways. They can appear as a single repeating layer around the mandala, as long petal-like elements, or as accent patterns between larger shapes. Feather motifs work especially well when you want a mandala to look graceful, flowing and slightly ornate.
Why feather patterns are useful in mandala art
Feather patterns help you practice several important mandala skills at once. They improve your control over curved lines, teach you how to repeat small details evenly, and help you understand how to create movement in a symmetrical design. Unlike simple petals or dots, feather patterns require a bit more patience, but the result is worth it because they instantly make a mandala look more detailed and advanced.
They are also very flexible. A feather can be made simple for a clean beginner-friendly design or decorated heavily for a more complex and luxurious look.
Basic structure of a feather pattern
Before drawing a full feather mandala, it helps to understand the basic parts of a feather motif.
The first part is the central spine. This is the main line that runs through the middle of the feather and gives it direction.
The second part is the outer shape. This gives the feather its length, width and overall form. It can be slim, curved, pointed, rounded or slightly teardrop-shaped.
The third part is the side detailing. These are the repeated strokes, leaf-like curves, small arches or lines that fill both sides of the feather.
The fourth part is the finishing decoration. This may include dots, mini petals, tiny parallel lines, scallops or inner borders that make the feather more decorative.
How to draw a simple feather pattern step by step
Start by drawing a slightly curved vertical line. This is the feather spine. The curve should be gentle, not too bent, because a very strong curve can make the pattern look unstable.
Next, create the outer boundary by drawing two smooth lines from the top and bottom of the spine, meeting in a pointed or rounded tip. This gives you the basic feather shape.
Now begin adding small curved strokes from the spine outward toward the edges. Draw them one at a time on one side first, then repeat them on the other side. These strokes can resemble small leaves, thin arches or short tapered lines. Try to maintain similar spacing and length.
Once the feather is filled, you can add a second layer of details. For example, place dots along the spine, draw tiny parallel lines inside each section, or outline part of the feather to make it stand out more.
Finally, darken the main spine slightly so the feather keeps a clear structure.
A basic practice exercise
To get comfortable, do not start with a full mandala immediately. First practice drawing three to five individual feathers in a row.
Draw one straight feather, one slightly curved feather, one long narrow feather and one shorter rounded feather. This exercise helps you understand how the feather shape changes while still keeping the same basic structure.
Once you feel comfortable, draw a circle and place six or eight feather patterns around it like petals. This is the easiest way to introduce feather motifs into a mandala.
How to use feather patterns in a mandala
Feather motifs can be placed in different layers depending on the look you want.
If you use them near the center, keep them small and simple. Too much detail in the inner layers can make the mandala look crowded.
If you use them in the middle section, they can become a feature pattern. This is often the best place because there is enough space to show their decorative beauty.
If you place them in the outer layers, make them slightly longer and more dramatic so they help expand the mandala and create a flowing finish.
Feathers also pair beautifully with dots, petals, paisleys and leaf patterns. A nice combination is to place simple lotus petals inside, paisleys in the middle, and feather motifs in an outer ring.
Tips for drawing beautiful feather patterns
Keep the spine smooth. The entire pattern depends on it. If the spine is shaky, the feather will look awkward.
Work slowly. Feather details are built through repetition, and rushing often causes uneven spacing.
Use a light pencil first. This allows you to adjust the shape before committing with a pen.
Match both sides as closely as possible, but do not stress about perfect realism. Mandala feathers are decorative, so clean balance matters more than making them look like actual bird feathers.
Leave breathing space between feathers when using them around a circle. If they are too close, the design can feel heavy.
Common mistakes and how to avoid them
One common mistake is making the feather too wide at the base and too narrow at the top too suddenly. This creates a clumsy shape. Instead, let the width change gradually.
Another mistake is drawing the side details too differently on each side. The feather may then look twisted or off-balance. To avoid this, pause after every few strokes and compare both sides.
Some learners also make the lines too thick too early. Feather patterns look best when they begin with light, elegant strokes. You can always darken selected outlines later for emphasis.
A final mistake is overdecorating every single feather in the mandala. When every feather has too many dots, lines and mini shapes, the design can become visually tiring. Mix detailed feathers with simpler ones to keep the mandala balanced.
Simple variations you can try
Once you understand the basic feather form, you can start experimenting with variations.
You can create a peacock-style feather by widening the top and adding layered oval or eye-shaped details inside.
You can create a leaf-feather hybrid by replacing fine side strokes with bold leaf segments.
You can create a tribal-style feather by using strong, graphic lines and sharp pointed edges.
You can create a soft ornamental feather by adding dots, scallops and tiny arches along the border.
These small changes allow one pattern family to produce many different visual effects.
Mini practice challenge
Draw one small circular mandala with eight feather motifs as the main outer layer. In the center, use a simple flower or dot pattern. Between each feather, add small dots or tiny leaf fillers so the design feels connected.
Keep the first attempt simple. The goal is not to make it perfect but to understand rhythm, spacing and flow.
Lesson recap
In this lesson, you learned that feather mandala patterns are built around a central spine, an outer shape, repeated side details and optional decorative finishing. You learned how to draw a basic feather step by step, how to practice it separately before using it in a mandala, and how to place feather motifs in different mandala layers for the best effect. You also learned how to avoid common mistakes such as uneven sides, clumsy proportions and excessive detailing.
Feather patterns are a wonderful bridge between simple floral shapes and more advanced ornamental mandala design. Once you master them, your mandalas will start looking more graceful, layered and expressive.
Previous Lesson : Lesson 14: Geometric mandala designs
In the next lesson, we will continue with Lesson 16: Spiral mandala designs.
Support the free Mandala Art Academy
Learning mandala art with us? The Mandala Art Academy is completely free, and every contribution helps us create more step-by-step lessons, practice guides and original tutorial images.
Even a small contribution helps us continue the next lesson.
For supporters in India
Scan the QR code below or use the UPI ID to contribute any amount you are comfortable with.

UPI ID: pallavi.rags-1@okhdfcbank
Pay securely through Razorpay
Prefer to pay by card or another supported online payment method? Use our secure Razorpay page below. Indian and international cards are accepted.
Support Mandala Art Academy and help create the next free lesson
Your support is entirely optional. Every Mandala Art Academy lesson will remain free for everyone.
Thank you for learning with us and helping us create the next lesson. ❤️